
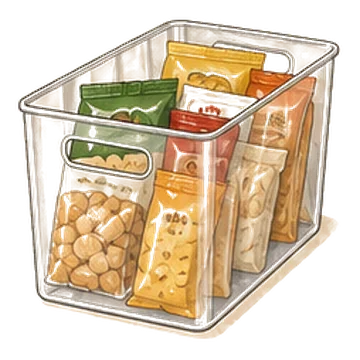
Simple Houseware clear pantry bins, 4 pack
Four 14 x 7 inch clear bins for snacks, packets and baking supplies.
Check priceA small pantry rarely runs out of space. It runs out of usable space, because deep shelves hide the back row and tall gaps above short items go to waste. These ideas fix both problems with shelf zones, a few measurements and the right risers and bins, and there is a printable checklist at the end.
As an Amazon Associate I earn from qualifying purchases. Links on this page are affiliate links: if you buy through them, I may earn a small commission at no extra cost to you.

Part of our guide: Small Kitchen Organization Ideas: A Zone-by-Zone Plan →
Organizing a small pantry comes down to three moves. Edit what you keep, give each shelf one job based on how often you reach for it, and add height and pull-out access so nothing hides at the back.
Plan two to four hours for a reach-in pantry or a tall pantry cabinet: about an hour to empty and sort, a little time to measure, and the rest to set up bins and labels. Shop after you measure, not before.
This guide is for a pantry you already have, whether it is a narrow closet, a reach-in with wire shelves or a tall cabinet. If your kitchen has no pantry at all, that is a different problem with its own guide.
Buying containers first is the most common reason a pantry makeover does not last. You end up organizing food you do not eat. Start with what is actually there.
Height decides how often a shelf gets used. The shelves between your waist and shoulders are the easiest to see and reach, so they should hold what you cook with and eat every week.
The floor and the lowest shelf are best for heavy things: drinks, bulk bags of rice or flour, potatoes and onions in a breathable basket, and a step stool. Heavy items stored low are easier to lift and safer if they fall.
The top shelf is for backstock, paper goods and light items you use a few times a year, like holiday baking supplies. Store them in bins with handles so you can pull a whole bin down instead of reaching blindly.
If kids help themselves to snacks, put one low bin of approved snacks at their height and keep the rest up high. It saves you from being the snack gatekeeper all day.
Most small pantries waste the air above short items. A shelf with a can of beans under 15 inches of empty space is storing only a third of what it could.
If your shelves adjust, set the spacing to what you store. A standard 15-ounce can is about 4.5 inches tall, so cans need roughly 6 inches of clearance. Most cereal boxes are about 12 inches tall and need 13 to 14 inches. Tall bottles of oil and vinegar need about 14 inches.
If your shelves are fixed, add a second level instead. The Simple Houseware expandable stackable counter shelf is an expandable shelf with a metal top that adds a second level inside a cabinet or on a shelf, and its width adjusts to the space. Put short items like cans or spice jars underneath and lighter packets on top.
Wire shelves cause their own trouble: small jars tip and packets slide through the gaps. A sheet of shelf liner or a row of bins gives everything a flat base.
Deep shelves are where food goes to expire. The fix is to treat each shelf as a set of drawers: one bin per category, pulled forward when you need something.
The Simple Houseware clear pantry bins come as a 4 pack, and each bin is 14 by 7 by 3.75 inches. That size works well in a small pantry. A bin runs 14 inches front to back, close to the full depth of many pantry shelves, and three fit side by side on a shelf about 21 to 24 inches wide.
Use low bins for things that flop over or get lost: seasoning packets, granola bars, pouches, tea and baking odds and ends. Being clear, they let you see when you are running low without pulling them out.
Put the label on the front edge, facing out, and keep the categories broad. One bin labeled snacks works better than three labeled chips, crackers and bars, because nobody has to think about where something goes back.

Cans stacked flat on a shelf turn into a guessing game, and you end up buying a third can of tomatoes because the other two were hiding. A can rack keeps them in rows with the labels showing.
The Simple Houseware 3-tier stackable can rack holds up to 36 cans on three tiers so every label faces out. Because it stacks, you can start with one and add another if your can collection grows.
For spices and small jars, a stepped riser does the same job. The Copco 3-tier non-skid spice rack is a 15 inch stepped shelf, so the back row of jars sits higher than the front and stays visible. On a shelf about 24 inches wide, it leaves room beside it for a bin.
Whatever you use, put new cans and jars behind or under the old ones. First in, first out is the simplest way to cut down on expired food.
L-shaped pantries and deep closet shelves have dead corners that are almost impossible to reach. A turntable is the easiest fix because one spin brings the back to the front.
The Copco 18 inch non-slip lazy Susan turntable is 18 inches across, so it only fits on a shelf at least 18 inches deep, with a little extra so items clear the walls as it turns. On a typical 12- to 16-inch pantry shelf it will not fit; save it for a deep corner, a deep bottom shelf or the floor of a closet pantry.
Turntables are best for round or upright items: oils, vinegars, nut butters, sauces and jars. Boxes and bags slide off or jam, so keep those in bins.
For a deep shelf where a turntable does not fit, use a bin for the back half and keep only one row of items in front. It is better to lose a little capacity than to lose food behind other food.
In a small pantry, the door is often the biggest empty surface. Light, flat items work there: spice packets, gravy mixes, tea, snack bars, foil and plastic wrap.
The Simple Houseware 15-pocket over-the-door pantry organizer comes as a 2 pack, each with 15 clear pockets that hang over a pantry or cabinet door. Clear pockets keep small packets visible, which is the main reason they get lost on shelves.
Before you buy any over-the-door organizer, close the door and measure the distance from the back of the door to the front of the nearest shelf. Whatever hangs on the door, plus what you put in it, has to fit in that gap. Also check that the door's top edge has a small gap at the frame for the hooks to sit in.
Keep heavy jars and cans off the door. They make it harder to swing and put strain on the hinges.

Matching jars look great, but decanting everything takes time and money and turns into a chore every grocery trip. Decant only the dry goods you use every week and buy in bags that do not reseal well, such as rice, oats, pasta, flour, sugar and beans.
Ball wide-mouth mason jars are glass jars with lids and bands, and the wide mouth makes it easy to scoop and pour. They suit the eye-level shelf, where you will see when you are running low. A quart jar holds 4 cups.
Before you toss the original bag, cut out the cooking directions and the date and tape them to the back of the jar or the underside of the lid. When you refill, finish the old food before pouring in the new.
Leave crackers, chips and cereal in their bags or boxes and put them in a bin instead. They go stale fast once opened, and a bin is quicker than refilling a container.
You can make a real difference without buying much. Start low and add pieces only where something still is not working.
Low: edit, regroup by category, reuse shoeboxes or baskets you already own as bins, set up a use-first basket and write simple labels with tape and a marker.
Medium: clear bins for loose items, a can rack and a spice riser on the eye-level shelves, an over-the-door pocket organizer and a few jars for the staples you use most.
Splurge: replace wire shelves with solid shelving, add pull-out drawers to deep shelves or a corner turntable, and add battery-powered lighting if the pantry is dark.
Renters can do the low and medium plans without tools. Freestanding bins, risers, jars and over-the-door organizers leave no marks, and they move with you to the next kitchen.

Most small pantries slide back into chaos for the same reasons, and most of them come from the setup, not from the people using it.
To keep it working, put groceries away by category right after shopping, with new items behind old ones. Once a month, spend ten minutes pulling forward what has drifted back and checking the use-first bin. Once a season, empty one shelf at a time and wipe it down.
Four 14 x 7 inch clear bins for snacks, packets and baking supplies.
Check price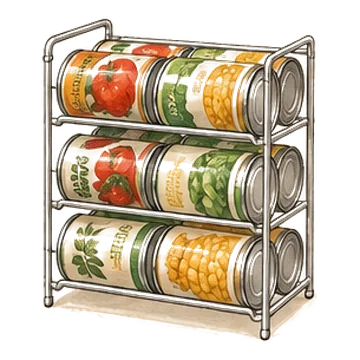
A stackable three-tier rack that holds up to 36 cans so every label faces out.
Check price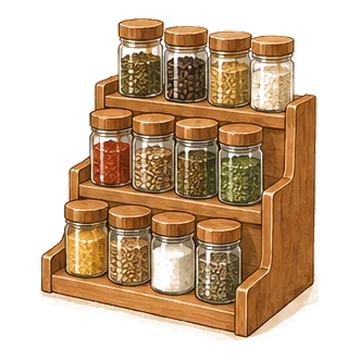
A stepped 15 inch spice shelf so back-row jars stay visible.
Check price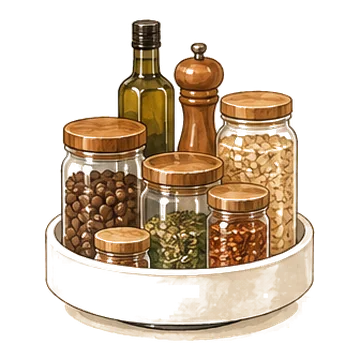
An 18 inch non-slip turntable that spins so nothing gets lost at the back of a cabinet.
Check price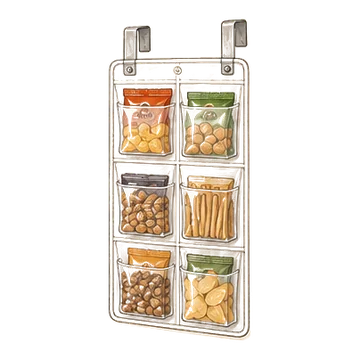
Two clear 15-pocket organizers that hang over a pantry or cabinet door.
Check price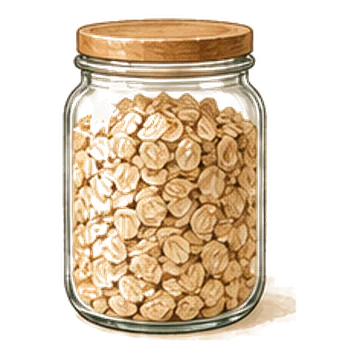
Wide-mouth glass jars with lids and bands, for pantry staples, overnight oats or homemade jam.
Check price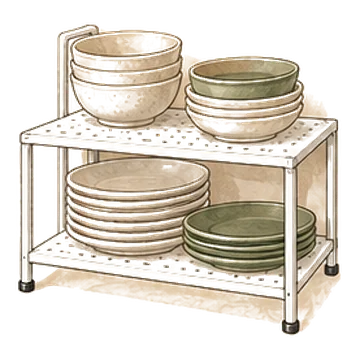
An expandable shelf that doubles cabinet or counter space with a second level.
Check priceTreat each deep shelf as a set of drawers: put items in bins you can pull forward, use a turntable in deep corners and keep only one row of loose items in front so nothing hides at the back.
Give items a flat base with shelf liner or bins so small jars do not tip and packets do not slip through. Bins also make it easy to pull a whole category forward.
Match the spacing to what you store. Cans need about 6 inches, most cereal boxes need 13 to 14 inches and tall bottles need about 14 inches. If shelves are fixed, add a second-level shelf to use the gap.
No. Decant the dry goods you use weekly and that come in bags that do not reseal well, like rice, oats, flour and pasta. Leave crackers, chips and cereal in their packaging in a bin.
Backstock, paper goods and light items you use a few times a year, stored in bins with handles so you can lift a whole bin down safely.
Plan two to four hours for a reach-in pantry or pantry cabinet, including emptying, sorting, measuring and setting up bins and labels. Shopping for organizers is extra.


