
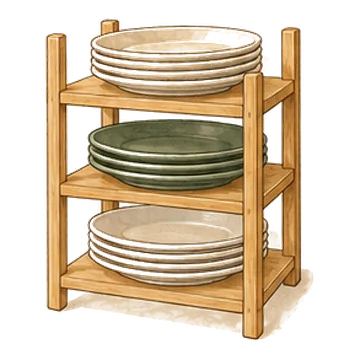
Bamboo 3-tier corner plate organizer
A three-tier bamboo shelf for stacking plates and bowls in a cabinet.
Check priceA kitchen with no pantry is not short on space so much as short on one place for food. The fix is to build that place out of what you have: one or two cabinets set up like pantry shelves, plus a cart, a door or a nearby closet for overflow. Here is how to plan it, step by step, with a printable plan at the end.
As an Amazon Associate I earn from qualifying purchases. Links on this page are affiliate links: if you buy through them, I may earn a small commission at no extra cost to you.

Part of our guide: Small Kitchen Organization Ideas: A Zone-by-Zone Plan →
Without a pantry, food ends up scattered across every cabinet, the counter and the top of the fridge. The goal is to bring it back together into a few clearly defined spots, so you always know where to look and where to put groceries away.
The plan that works in most small kitchens: decide how much food you really need to keep, free up one cabinet to be the pantry, set it up in zones, then add one overflow spot such as a rolling cart, a door rack or a closet shelf. Backstock lives outside the kitchen.
Plan an afternoon, about three to four hours, to empty cabinets, sort and set things up. Shop for organizers only after you know which cabinet is becoming the pantry and have measured it.
Before you move anything, find out how much food you are working with. Most people without a pantry overestimate the space they need, because food is spread out and duplicates hide in different cabinets.
Look at every cabinet and nearby space with fresh eyes. The best pantry spot is close to where you cook, easy to reach and away from heat and moisture.
Upper cabinets near the fridge or the main prep counter are often the best choice. Standard upper cabinets are about 12 inches deep, which is shallow enough that a can or jar never gets lost behind three others.
Dry goods keep best somewhere cool and dry. Avoid the cabinet right beside the oven, the one directly over the dishwasher, where steam rises when you open it after a cycle, and the cabinet under the sink, which is for cleaning supplies, not food.
Outside the kitchen, a hall closet shelf, a dining room hutch or a bookcase near the kitchen can hold backstock and bulky items like paper towels and drink cases.
Most kitchens without a pantry still have enough cabinet space for food; it is just taken up by things you rarely use. Clearing one good cabinet usually does more than any organizer you could buy.
Start with what is in the cabinets closest to the prep area. Move rarely used appliances, serving platters, holiday dishes and spare vases out of the kitchen, to a closet, a high shelf or under a bed. Anything you use a few times a year does not need prime cabinet space.
Then consolidate what stays. Dishes often take up more cabinet than they need because plates and bowls are stacked on one level with tall air above them. The Bamboo 3-tier corner plate organizer is a three-tier bamboo shelf for stacking plates and bowls in a cabinet, so one shelf can hold what used to take two.
When you are done, you want one full cabinet, ideally an upper near the fridge, that holds nothing but food. That cabinet is your pantry.
Treat the cabinet the way you would a small pantry: each shelf gets one category, and the most-used food sits at the easiest height.
In a standard upper cabinet, the bottom shelf is the easiest to see and reach, so it holds dinner staples and breakfast. The middle shelf holds snacks, baking basics and cans. The top shelf, often hard to reach without a step stool, holds light backup items and things you use occasionally.
Clear bins turn a shelf into drawers. The ClearSpace clear plastic pantry storage bins are clear, stackable bins that group items by type and pull out like drawers, which suits loose packets, snack bars and pouches that would otherwise fall over. Measure the cabinet depth before you buy, so the bins sit flush with the front edge and the door still closes.
Label the front of each bin and shelf with the category. When someone else unpacks the groceries, the labels do the explaining.

Base cabinets are usually about 24 inches deep, and without help, the back half becomes a place where food is forgotten. A pull-out solves that by bringing the whole shelf to you.
The LYNK Professional pull-out cabinet organizer is a chrome slide-out drawer that turns a deep lower cabinet into easy-reach storage. In a no-pantry kitchen it is a good home for heavy items like cans, jars of sauce, bags of rice and bottles of oil, which are safer stored low than overhead.
Before you buy, measure the cabinet's door opening, not just the inside. Many cabinets have a face frame that makes the opening narrower than the interior, and door hinges stick into the opening on one side. A pull-out has to clear both to slide freely.
If a pull-out is not an option, the low-cost version is a row of bins with handles. Each bin holds one category, and you pull the whole bin forward to reach the back.
Many kitchens have a narrow gap between the fridge and the wall or the end of the counter. A rolling cart turns that gap into a small, mobile pantry you can pull out when you need it.
The Simple Houseware 3-tier heavy-duty rolling cart is a white metal cart with three tiers, made to add pantry space between the fridge and the wall. Measure the gap at the narrowest point, top to bottom, and check your fridge manual for any side clearance it needs.
Use the cart for one or two categories, not everything. Snacks on the top tier, breakfast items in the middle and drinks or potatoes and onions on the bottom works well. Put small items in bins on each tier so nothing falls through when it rolls.
A cart is also handy for anyone who bakes often. Keeping flour, sugar and baking supplies together on one cart means you can roll everything to the counter and roll it back when you are done.

A door near the kitchen, such as a broom closet, a laundry closet or a basement door, can act like a whole pantry wall. Door racks hold small items in a single row, so everything is visible at once.
The JARLINK 5-shelf over-the-door organizer is a five-shelf rack that hangs on a door for cans, jars and snacks, with no drilling. Before you buy, close the door and check the space between its back and whatever sits behind it, and make sure the top of the door has a small gap at the frame for the hooks.
Load the door with care. Keep the heaviest jars on the lower shelves, and do not overload a hollow interior door. A door that swings heavily is a sign there is too much on it.
A shelf in a hall or coat closet makes a good backstock spot. Keep spares in one labeled bin and restock the kitchen from it, instead of letting backups spread into kitchen cabinets.
Organizing helps, but in a kitchen without a pantry, the way you buy food matters just as much. Bulk packs only save money if you have somewhere to put them.
Buy shelf-stable foods in sizes your cabinet can hold, and restock more often instead of buying big. Keep a running list on the fridge or your phone so you know what is already in the backstock bin before you shop.
Use first in, first out: put new groceries behind or under older ones. Once a week, glance through the pantry cabinet before writing the grocery list.
Flour, grains, cereal and other dry goods keep better in airtight containers once opened, especially in a kitchen where food is stored near the stove or in open shelving. Containers also stack, which packets and bags do not.
You can create real pantry space without buying furniture. Start with the low plan and add only what you still need.
Low: clear one cabinet of non-food items, sort food into zones, use shoeboxes or baskets you own as bins, and move backstock to a closet. Label shelves with tape and a marker.
Medium: clear bins for the cabinet pantry, a plate organizer to free cabinet space, a rolling cart in the gap beside the fridge and an over-the-door rack on a nearby closet.
Splurge: a pull-out organizer in a deep base cabinet, a freestanding pantry cabinet in the dining area or a tall cabinet added to the end of a run of counters.
Renters can do nearly all of this without tools. Bins, carts, plate organizers and over-the-door racks need no drilling and move with you. Check with your landlord before installing anything that screws into a cabinet.

Most no-pantry kitchens drift back into clutter for the same reasons, and they are easy to fix once you spot them.
To keep it working, put groceries away by zone as soon as you get home, restock the kitchen from the backstock bin instead of buying more, and do a ten-minute reset each week: pull food forward, toss what is finished and wipe one shelf.
A three-tier bamboo shelf for stacking plates and bowls in a cabinet.
Check price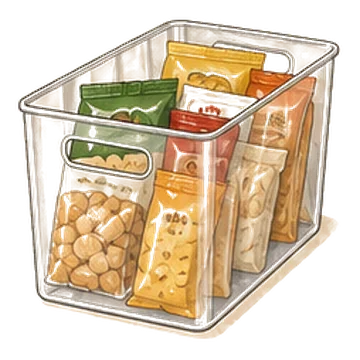
Clear bins that group pantry items by type and pull out like drawers.
Check price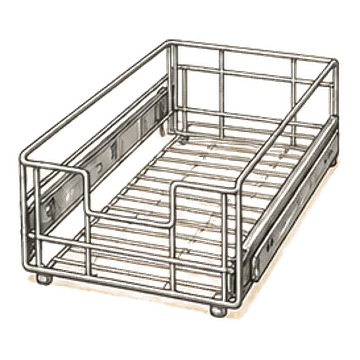
A slide-out drawer that turns a deep lower cabinet into easy-reach storage.
Check price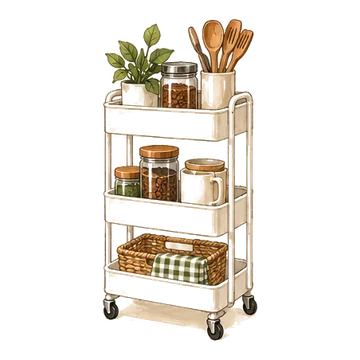
A white metal three-tier cart that adds pantry space between the fridge and wall.
Check price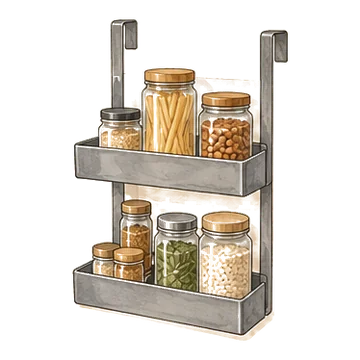
A five-shelf rack that hangs on a door for cans, jars and snacks.
Check pricePick one or two cabinets close to where you cook, ideally upper cabinets near the fridge, and set them up like pantry shelves. Add a rolling cart, a door rack or a closet shelf for overflow and backstock.
A cleared kitchen cabinet with bins, a pull-out in a deep base cabinet, a rolling cart beside the fridge, an over-the-door rack on a nearby closet or a freestanding cabinet or hutch in the dining area.
Avoid the cabinet beside the oven, the one directly above the dishwasher and the cabinet under the sink. Food keeps best somewhere cool and dry, away from cleaners.
Give each shelf one food category, put everyday items at the easiest height, use clear bins that pull out like drawers and label shelves and bins so everyone puts things back in the same place.
Keep one open and one spare of each item in the kitchen and put the rest in a labeled bin in a hall closet or another nearby spot. Restock from that bin before you buy more.
Plan an afternoon, about three to four hours, to empty cabinets, sort food, free up a cabinet and set up zones. Shopping for organizers is extra.


