
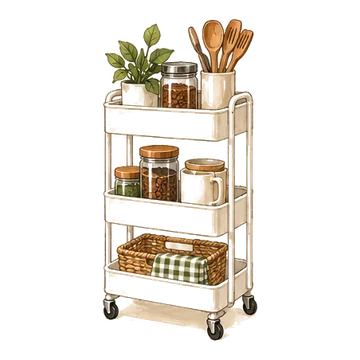
Amazon Basics 3-tier rolling cart with lockable wheels
A metal three-tier cart on lockable wheels that rolls a coffee setup wherever there is room.
Check priceWhen every inch of counter is already spoken for, the coffee station has to live somewhere else. Below are six setups that work with zero counter space, a quick fit test to run before you buy anything, and the power, steam and spill basics that keep an off-counter station safe.
As an Amazon Associate I earn from qualifying purchases. Links on this page are affiliate links: if you buy through them, I may earn a small commission at no extra cost to you.

Part of our guide: Coffee Bar Ideas for Small Spaces: Layouts That Fit →
A coffee station needs only one thing from your kitchen: a flat, sturdy surface for the brewer within reach of a wall outlet. Everything else, from mugs to pods to sugar, can go on the wall, a door, a drawer or a lower shelf.
So the question is not where the whole station goes. It is where the brewer goes, and then how close you can keep the supplies. Match the setup to the space you actually have.
If you do have a sliver of counter and just want it to work harder, our coffee bar ideas for small spaces guide covers counter corners, shelves and pod storage. This article is only for kitchens where the counter is truly off limits.
Off-counter setups fail for the same reasons: the lid hits a shelf, the cord does not reach, or the surface is too low to pour comfortably. Check all three with the machine you already own.
A cart is the most flexible answer because it fits gaps nothing else will, and it moves when you need the floor. The Amazon Basics 3-tier rolling cart with lockable wheels holds the brewer on the top tier and coffee, filters and mugs on the two below.
Good parking spots include the gap between the fridge and a wall, the end of a cabinet run, beside a doorway or in a dining room corner. If the cart lives in a tight gap, roll it out a few inches to brew so steam is not trapped against a wall or cabinet side.
Lock the wheels before you brew, every time. Put the heaviest items, like a bag of beans or a water pitcher, on the bottom tier so the cart stays steady, and run the cord along a back leg so it cannot catch on a passing foot.
When choosing a cart, compare the top tier's width and depth with the brewer's footprint from your fit test, look for a raised rim so mugs and jars do not slide off, and pick metal or sealed surfaces that wipe clean after a spill.

If you have a bare stretch of wall but no counter, a bakers rack works as a coffee bar and a pantry shelf in one. The SUPERJARE 4-tier bakers rack with power outlet is built to work as a standalone coffee bar, with the brewer on whichever shelf sits closest to counter height and storage above and below.
A built-in outlet is handy, but check before you plug a brewer into it. Read the rack's listed electrical rating and your coffee maker's manual, since many brewer manuals ask to be plugged straight into a wall outlet. When in doubt, use the built-in outlet for low-power items like a phone charger or a light, and run the brewer to the wall.
Tall racks can tip if the weight sits up high. Keep heavy items on the lower shelves, and if the rack comes with an anti-tip strap or wall bracket, use it.
The coffee station does not have to be in the kitchen. A sideboard in the dining room, a dresser in a hallway, a low bookcase near the living room or a desk in a studio apartment can all hold a brewer, as long as an outlet is close.
Protect the top with a tray or a silicone mat, since drips and water rings show quickly on wood. Use drawers or baskets for pods, filters and napkins, and keep the mugs on top or on a shelf just above.
This setup often looks the most finished, because the furniture is already part of the room. The trade-off is distance from the sink. Keep a water pitcher at the station so you are not carrying the tank across the house to refill it.
Height matters more than style here. A piece between about 30 and 36 inches tall puts the cup at a comfortable height to watch it fill. Anything much lower works for storing supplies but turns every brew into a bend.
A deep lower cabinet or a pantry shelf near an outlet can store the whole station behind a door. The brewer lives inside and slides forward or comes out onto a cutting board, a stovetop cover or a pulled-out shelf when it is time to brew.
Do not run a coffee maker inside a closed or tightly enclosed cabinet. Steam and heat build up and can swell or peel cabinet finishes over time. Brew where the steam can rise freely, then put the machine back once it has cooled.
A drawer under the machine keeps the cabinet tidy. The Amazon Basics Nespresso OriginalLine capsule drawer holds 50 capsules and sits under the machine, and the Mind Reader 3-drawer coffee pod organizer holds 36 single-serve pods with the brewer on top. Either one turns the shelf into a single unit you can slide forward together.

Sometimes there is room for a narrow console table or a wall ledge but nothing deeper. In that case, put only the brewer on the surface and move everything else up. Floating wall shelves with 10 mug hooks hold canisters and filters on top and hang mugs underneath, made for exactly this kind of coffee nook.
Hang the first shelf so the brewer's open lid clears it with a couple of inches to spare, which for most machines is about 18 to 20 inches above the surface. Screw shelves into studs, usually 16 inches apart in US homes, when they will hold full canisters and mugs.
For a wall with no surface at all, a mug rack alone can still clear a cabinet shelf. The 17 inch wall-mounted coffee mug rack hangs mugs on the wall instead of in a cabinet, which frees that cabinet space for the brewer and supplies.
When no single spot fits everything, split the station into two. The brewer lives where it fits, often in a cabinet or on a cart, and supplies live wherever there is slack space nearby.
Good slack spots include the inside of a cabinet door for filters and tea, an over-the-door pocket organizer on the pantry for backup pods, a drawer for spoons and sugar packets, and a wall hook for the mug you use every morning.
The rule that keeps a split station working is distance. Keep the daily items within two steps of the brewer, and accept that backups can be farther away. If you have to cross the kitchen to grab the coffee each morning, move the coffee, not the brewer.
A small tray or caddy helps a split station feel like one thing. Carry the canister, spoon and sugar to the brewer each morning and back to their shelf afterward, which takes seconds and keeps every surface clear in between.
Off-counter stations raise a few practical questions that a counter setup never does. Settle them before you style anything.
Light is the last piece. Carts and cabinet stations often end up in dim corners. The MCGOR rechargeable under-cabinet lights, 2 pack are magnetic, motion-sensor LED bars that need no wiring, so they can light a cart shelf or the inside of a cabinet and switch on when you reach in.

Most off-counter coffee stations that get abandoned fail on comfort, not looks. If brewing takes more steps than before, the station will drift back onto the counter within a week.
A metal three-tier cart on lockable wheels that rolls a coffee setup wherever there is room.
Check price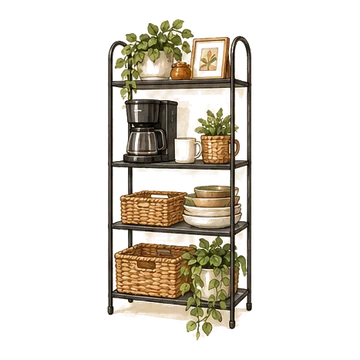
A four-tier rack with a built-in power outlet that works as a standalone coffee bar.
Check price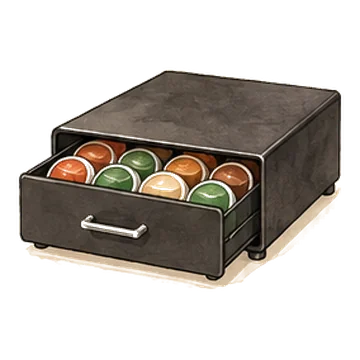
A drawer for 50 Nespresso OriginalLine capsules that sits under the machine.
Check priceA low countertop drawer that holds 36 single-serve pods and lets the coffee maker sit on top.
Check price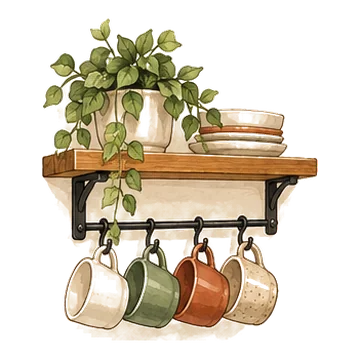
Floating shelves with adjustable hooks underneath, made for a coffee nook.
Check price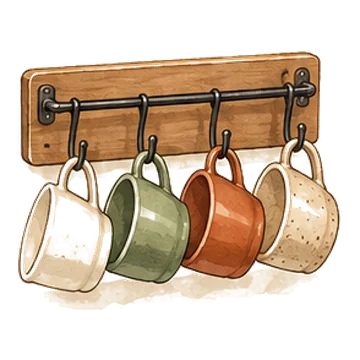
A heavy-duty 17 inch rack that hangs mugs on the wall instead of in a cabinet.
Check price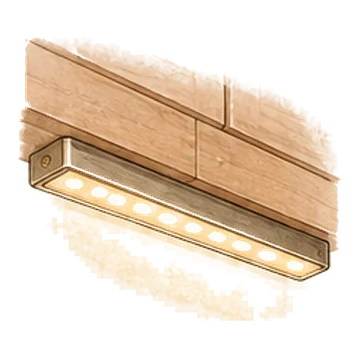
Two magnetic, motion-sensor LED bars that light a dark counter corner with no wiring.
Check priceOn a rolling cart, a freestanding rack, a piece of furniture near an outlet in another room, or in a cabinet you pull it out of to brew. The brewer needs a flat, sturdy surface and a wall outlet within cord reach.
Yes, if the top tier is sturdy and level and the wheels lock. Lock them before every brew, keep heavy items on the bottom tier and route the cord where it will not get caught.
You can store it there, but bring it forward or out to brew. Brewing inside a closed cabinet traps steam and heat, which can damage the cabinet over time.
Measure your brewer with the lid open and add about 2 inches above it. Most stations need a surface a little wider than the brewer itself, with supplies moved to shelves, drawers or hooks.
Many coffee maker manuals advise plugging directly into a wall outlet. Check your machine's manual, and if the only free spot is far from an outlet, move the station rather than stretch a cord.
A rolling cart or a small dresser near an outlet works well, since either can sit outside the kitchen area. Keep a water pitcher beside it so refills do not mean a trip to the sink.


