


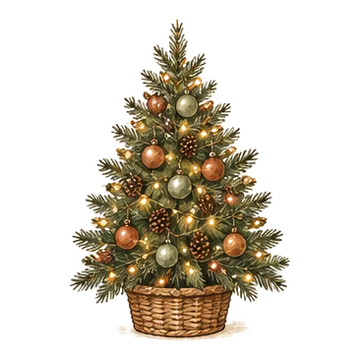
7.5 ft unlit spruce Christmas tree
A 7.5 ft artificial spruce with dense branches that is easy to put together.
Check priceLet's be honest: most trees look a little sad straight out of the box. You fluff a bit, hang every ornament you own, step back... and you can still see the pole. We've all been there. The good news is that a thin tree is almost never a shopping problem. It's a layering problem, and you can fix it in an evening. This list works for budget artificial trees, slim trees squeezed into small apartments and old trees that went flat in the garage, starting with the fixes that matter most and ending with the fun finishing stuff.
As an Amazon Associate I earn from qualifying purchases. Links on this page are affiliate links: if you buy through them, I may earn a small commission at no extra cost to you.

Here's the thing nobody tells you: a sparse-looking tree usually isn't short on decorations. It's short on depth. When every ornament hangs off the tips and the lights only wrap the outside, your eye slides right past them to the gaps and that metal pole in the middle. Trees that look lush are built in layers from the trunk out: branches fluffed, lights deep inside, filler, ornaments, then the finishing touches.
So before you buy a single thing, give the first steps real time. They matter way more than anything sitting in a shopping cart. Clear the floor, grab a stepladder, and dump what you already own into four piles: big ornaments, small ornaments, ribbon and picks. Nine times out of ten you'll realize you don't need more ornaments. You need filler.
Fluffing is boring. It's also the single biggest fix for an artificial tree, and it's free. Branches come out of the box squashed flat, and a flat branch is basically a window straight to the pole. Work one section at a time from the bottom up, starting where each branch meets the trunk and moving out to the tip.
Spread the little tips like a fan: one up, one down, one to each side, so they fill space in every direction instead of lying flat. Do the inner tips too, even the ones you think nobody will see (they will). Wear gloves, put on a podcast, and give a 6 to 7.5 ft tree a good 30 to 60 minutes. Annoying? A bit. Worth it? Completely.
If you're in a small apartment, a corner is your thin tree's best friend. Two walls hide the back, so suddenly you only have to make about two thirds of the tree look full. That's a huge head start.
Spin the tree until its best side faces the room, then go hunting for gaps on the front. On a lot of artificial trees you can bend branches from the back toward the front, or move a hinged branch from the wall side into a bald spot people actually see. Let the back be scrawny. Honestly, nobody is checking. Just leave a few inches between the branches and the walls so the lights aren't squished against the paint.
Lights only on the outside give you a glowing shell with a dark middle, and that dark middle is exactly what makes a tree look thin. Light the inside and the whole thing glows from within, which reads as dense from across the room. So skip the classic spiral. Wrap along each main branch instead: start near the trunk, run out to the tip, come back, then move on to the next one.
A common rule of thumb is about 100 lights per foot of tree height, so ruoghly 700 for a 7 ft tree, and more if you want that extra-full look. Pick green wire on a green tree, because white cords stick out like a sore thumb. Start at the bottom near the outlet and test every string before it goes on. Future you will be grateful.
Once the inside is glowing, a second, lighter layer on the outer third is what gives you sparkle, and it quietly hides whatever gaps are left. Tiny lights on thin wire are perfect here because they read as twinkle, not bulbs. A dimmable string lets you match the inner layer so the tree doesn't look blotchy.
One rule I'd never break: keep every string the same color. Mixing cool white and warm white is one of the most common reasons a tree looks patchy, in photos and in real life. And if your tree came prelit and the lights look a little thin, this is the easy upgrade. No need to replace the whole tree.
This is the decorator trick most of us skip: fill the inside first. Hang your biggest, plainest ornaments deep in the branches, close to the trunk, so they block the pole and bounce the inner lights around. Shatterproof balls in one or two colors are ideal. They're the supporting cast, not the stars.
Go with colors that melt into your theme, like champagne, gold or matte green, and hang them in every gap you can see through. Then walk to the other side of the room and look again (you'll find more gaps, everyone does). As a rough starting point, many trees need around 10 to 15 ornaments per foot of height to look full, and most of them end up on this inner layer.
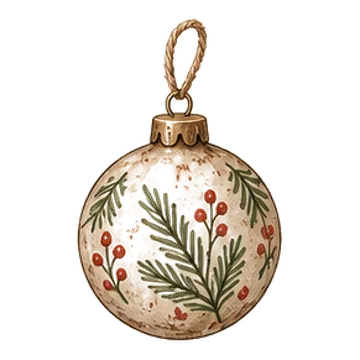
Ornaments spaced out evenly across the tree end up looking like polka dots, with a gap between every single one. Cluster them and each spot suddenly looks full, plus the eye gets fewer, bigger moments to land on. Wire three together in different sizes, small, medium and large, or mix one shiny, one matte and one glitter.
Hang the clusters in a loose zigazg, not neat rows (rows look a bit like a store display, and not in a good way), and tuck some partly into the branches so they look nested. This one is a lifesaver on cheaper trees with fewer branch tips, since one hook spot now holds three ornaments.
Picks are the decorator secret for gaps, and once you start using them it's hard to go back. They're short stems of berries, glittery leaves or sprays on a wire stem that you simply push into the tree. Because they stick out from the branches, they add the texture and height that round ornaments just can't.
Push the stem in at a slight upward angle and wrap the end around a branch so it doesn't flop. Spread them out, a few per row, some angled outward and some along the branch. Two or three kinds in one color family look intentional. Ten different kinds look like a craft store exploded.
Some gaps are too big for a pick: a missing branch, a bald patch smack in the middle. The fix is simple. Add more green. Tuck loops of dark green mesh ribbon into the hole and push them back toward the trunk, where they blend in and give your lights and ornaments something to sit against.
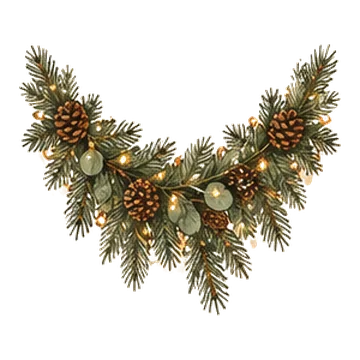
Faux pine garland does the same job. Cut it into short pieces or weave a length around the trunk through the thin section, then fluff it like a real branch. On a real tree, clippings from the tree lot work for a few days too. Once the bald spot is green again, decorate right over it and nobody will ever know.
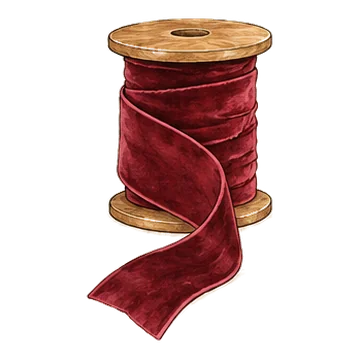
Ribbon fills space faster than pretty much anything, and vertical cascades are made for slim and pencil trees, which look even skinnier with a horizontal wrap. Start at the top and let a length of wired ribbon fall to the bottom, tucking it into the branches every 8 to 12 in so it makes soft waves. Repeat three to five times around the front.
Wired ribbon around 1.5 to 2.5 in wide holds its shape, so the loops stay puffy instead of going flat and sad. Tuck the ends deep into the branches and hide them under an ornament. One ribbon color plus one accent is plenty on a full tree. More than that gets busy fast.
Small bows are such a pretty way to fill the holes ornaments leave behind. Each one covers more space than a ball the same size, and a tree with 30 to 50 bows looks dense before you add anything else. Velvet ribbon about 1 in wide ties neat little bows that keep their shape.
Tie them all first, all the same size (an assembly line on the couch works great), then clip or twist them onto branches anywhere you can still see the trunk. Keep them one color so they read as a pattern instead of confetti. It works on any size tree, and on a tabletop tree a dozen bows can make it look done.
Shimmer tricks the eye into seeing more tree. Old-school tinsel icicles hang off the branches and catch light everywhere, which softens gaps and makes the tree look denser from a distance. The secret is patience: drape a few strands at a time over the tips instead of throwing handfuls, so they hang straight and don't clump.
Clear ornaments do something similar. They reflect the lights inside the tree and kind of glow, so you get fullness without extra visual weight. Both look great on a vintage or silver and white tree. Got pets? Skip loose tinsel, since cats love to chew it, and let clear ornaments and lights do the sparkling.
A small tree looks bigger when it stands taller. Sounds too simple, but it works. Set a 4 to 5 ft tree on a sturdy crate, stool or low table and you add 8 to 18 in of height, plus the ornaments land right at eye level, so it reads as a full-size tree in a small room.
Hide the riser with a tree collar, a basket or a skirt wrapped around it. A collar also makes the base look solid, which matters more than you'd think, because a skinny trunk poking out of a stand is one of the things that screams sparse. Just make sure the riser is wider than the stand, steady, and out of the main walkway.
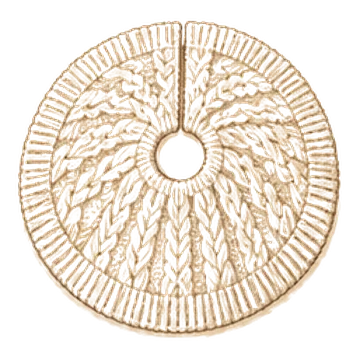
A bare stand at the bottom makes the whole tree look unfinished, even when the branches are full. Start with a wide skirt or collar: a 48 in skirt suits most 6 to 7.5 ft trees, while a collar is the better pick for slim ones.
And if you live alone, or hide gifts until the last minute, the space under the tree can look empty for weeks, which is weirdly a little sad. Wrapped empty boxes in two or three papers that match the tree are the same trick stores use. No shame in it, and you can reuse them every year. A basket of pine cones, a stack of blankets or a lantern fills the space too.
A garland swagged loosely around the tree adds a horizontal layer that ties the ornaments together and covers the gaps between rows. A lighted one gives you texture and glow in one go. Drape it, don't strangle the tree: let it dip between branches and tuck it in every foot or two.
On a full, wide tree, generous swags look lush. On a slim tree, though, go easy, or skip garland altogether and use ribbon cascades instead. Tight horizontal bands make a narrow tree look even narrower, kind of like a belt in the wrong place. Work from the top down so the swags stay even.
A tiny topper on a big tree makes the top look bare and puts a spotlight on the thinnest part of the tree. A topper with some width, like a big bow with streamers or a star with real presence, fills the top third and pulls the eye up, so the whole tree looks taller and fuller.
Bow toppers with long tails are especially forgiving, because the streamers run down the branches and connect the top to everything else. Fluff the very top branches before it goes on, and tuck a few picks around its base so the top doesn't end up looking like a lonely spike.

Short on time? Do the first three tonight: fluff every branch, put the tree in its best spot, and weave the lights deep inside. They cost little or nothing and make the biggest difference by far. Then add big ornaments on the inside and fill the base. Picks, ribbon, bows and tinsel are the finishing layers you can add whenever you feel like it.
The usual mistakes? Hanging every ornament on the tips, spiraling lights only around the outside, mixing warm and cool white, and a topper that's way too small for the tree. After each layer, walk to the far side of the room and squint a little. Anywhere you can still see the pole, that's where the next layer goes.
A 7.5 ft artificial spruce with dense branches that is easy to put together.
Check priceThree hundred warm white mini lights on green wire that disappears into the branches.
Check priceA 99 ft string of 300 LED lights on green wire with a remote for dimming and light modes.
Check priceAn 86 piece set of shatterproof champagne ornaments in mixed finishes.
Check priceThirty 2.36 inch shatterproof ornaments in classic red, green and gold.
Check priceTwenty-four champagne berry stems that tuck into gaps between branches.
Check priceSix 12 inch gold and green sprays that add height and texture between ornaments.
Check priceWide dark green mesh ribbon that can be tucked into bare spots to blend with the branches.
Check priceTwo 6 ft real-touch faux Norfolk pine garlands for the mantel, stairs or table.
Check priceA sheer wired ribbon with glitter swirls that holds its shape in big tree bows.
Check priceA long roll of burgundy velvet ribbon for tying bows on every branch or draping down the tree.
Check priceThree thousand silver tinsel strands for a vintage, shimmery fill.
Check priceThirty clear ball ornaments with champagne fillers that catch the tree lights.
Check priceA 22 inch natural wood collar that hides the stand and makes the base look solid.
Check priceA neutral braided cable knit tree skirt that makes the whole tree look cozier.
Check priceA 9 ft lighted garland with pinecones, red berries, bows, ornaments and candy accents.
Check priceAn 11 inch red wine velvet bow for the top of the tree with four long ribbon streamers.
Check priceWork in layers from the inside out. Fluff every branch, wrap the lights along the branches close to the trunk, hang large plain ornaments deep in the tree, then add smaller ornaments, picks and ribbon on the outer layer. Finish with a skirt or collar at the base and a topper sized to the tree.
A common rule of thumb is about 100 lights per foot of tree height, so around 700 for a 7 ft tree. For a very full, bright look, many people use more, often by adding a second layer of fine-wire lights on the outer branches.
Spend time fluffing every tip in different directions, place the tree in a corner so the back is hidden, and bend branches from the back to fill the front. Then fill the inside with big plain ornaments and tuck picks, mesh ribbon or extra garland into the bare spots.
Use vertical ribbon cascades instead of horizontal garland, fill the inside with lights and large ornaments, and choose a collar instead of a wide skirt. Clusters of ornaments and picks that stick out from the branches add width without making the tree look crowded.
Decorators fluff thoroughly, light the tree from the inside, keep a limited color palette, layer ornaments from large and plain inside to small and detailed outside, and finish with picks, ribbon and a substantial topper. They also step back often to check the tree from across the room.
Most decorators add ribbon after the lights and the inner filler ornaments but before the smaller decorative ornaments, so the ribbon sits deep enough to look woven in and the final ornaments can cover the tucked ends.


